AStoryCreator User Guide
This is the editable user guide for AStoryCreator. It is written around real user scenarios rather than around individual buttons.
Table of Contents
- Find your way around
- Create a quick social video
- Generate a complete story with AI
- Generate images from image prompts
- Generate videos from video prompts
- Add narration or text-to-speech
- Translate a story
- Use templates
- Create bulk exports
- Organize projects
- Export and share safely
- Manage AI settings and keys
- Troubleshooting
1. Find your way around
Use the story list to create, organize, translate, preview, and share stories. A story can be a short social media video, a family-and-friends memory, or a reusable setup for many exports.
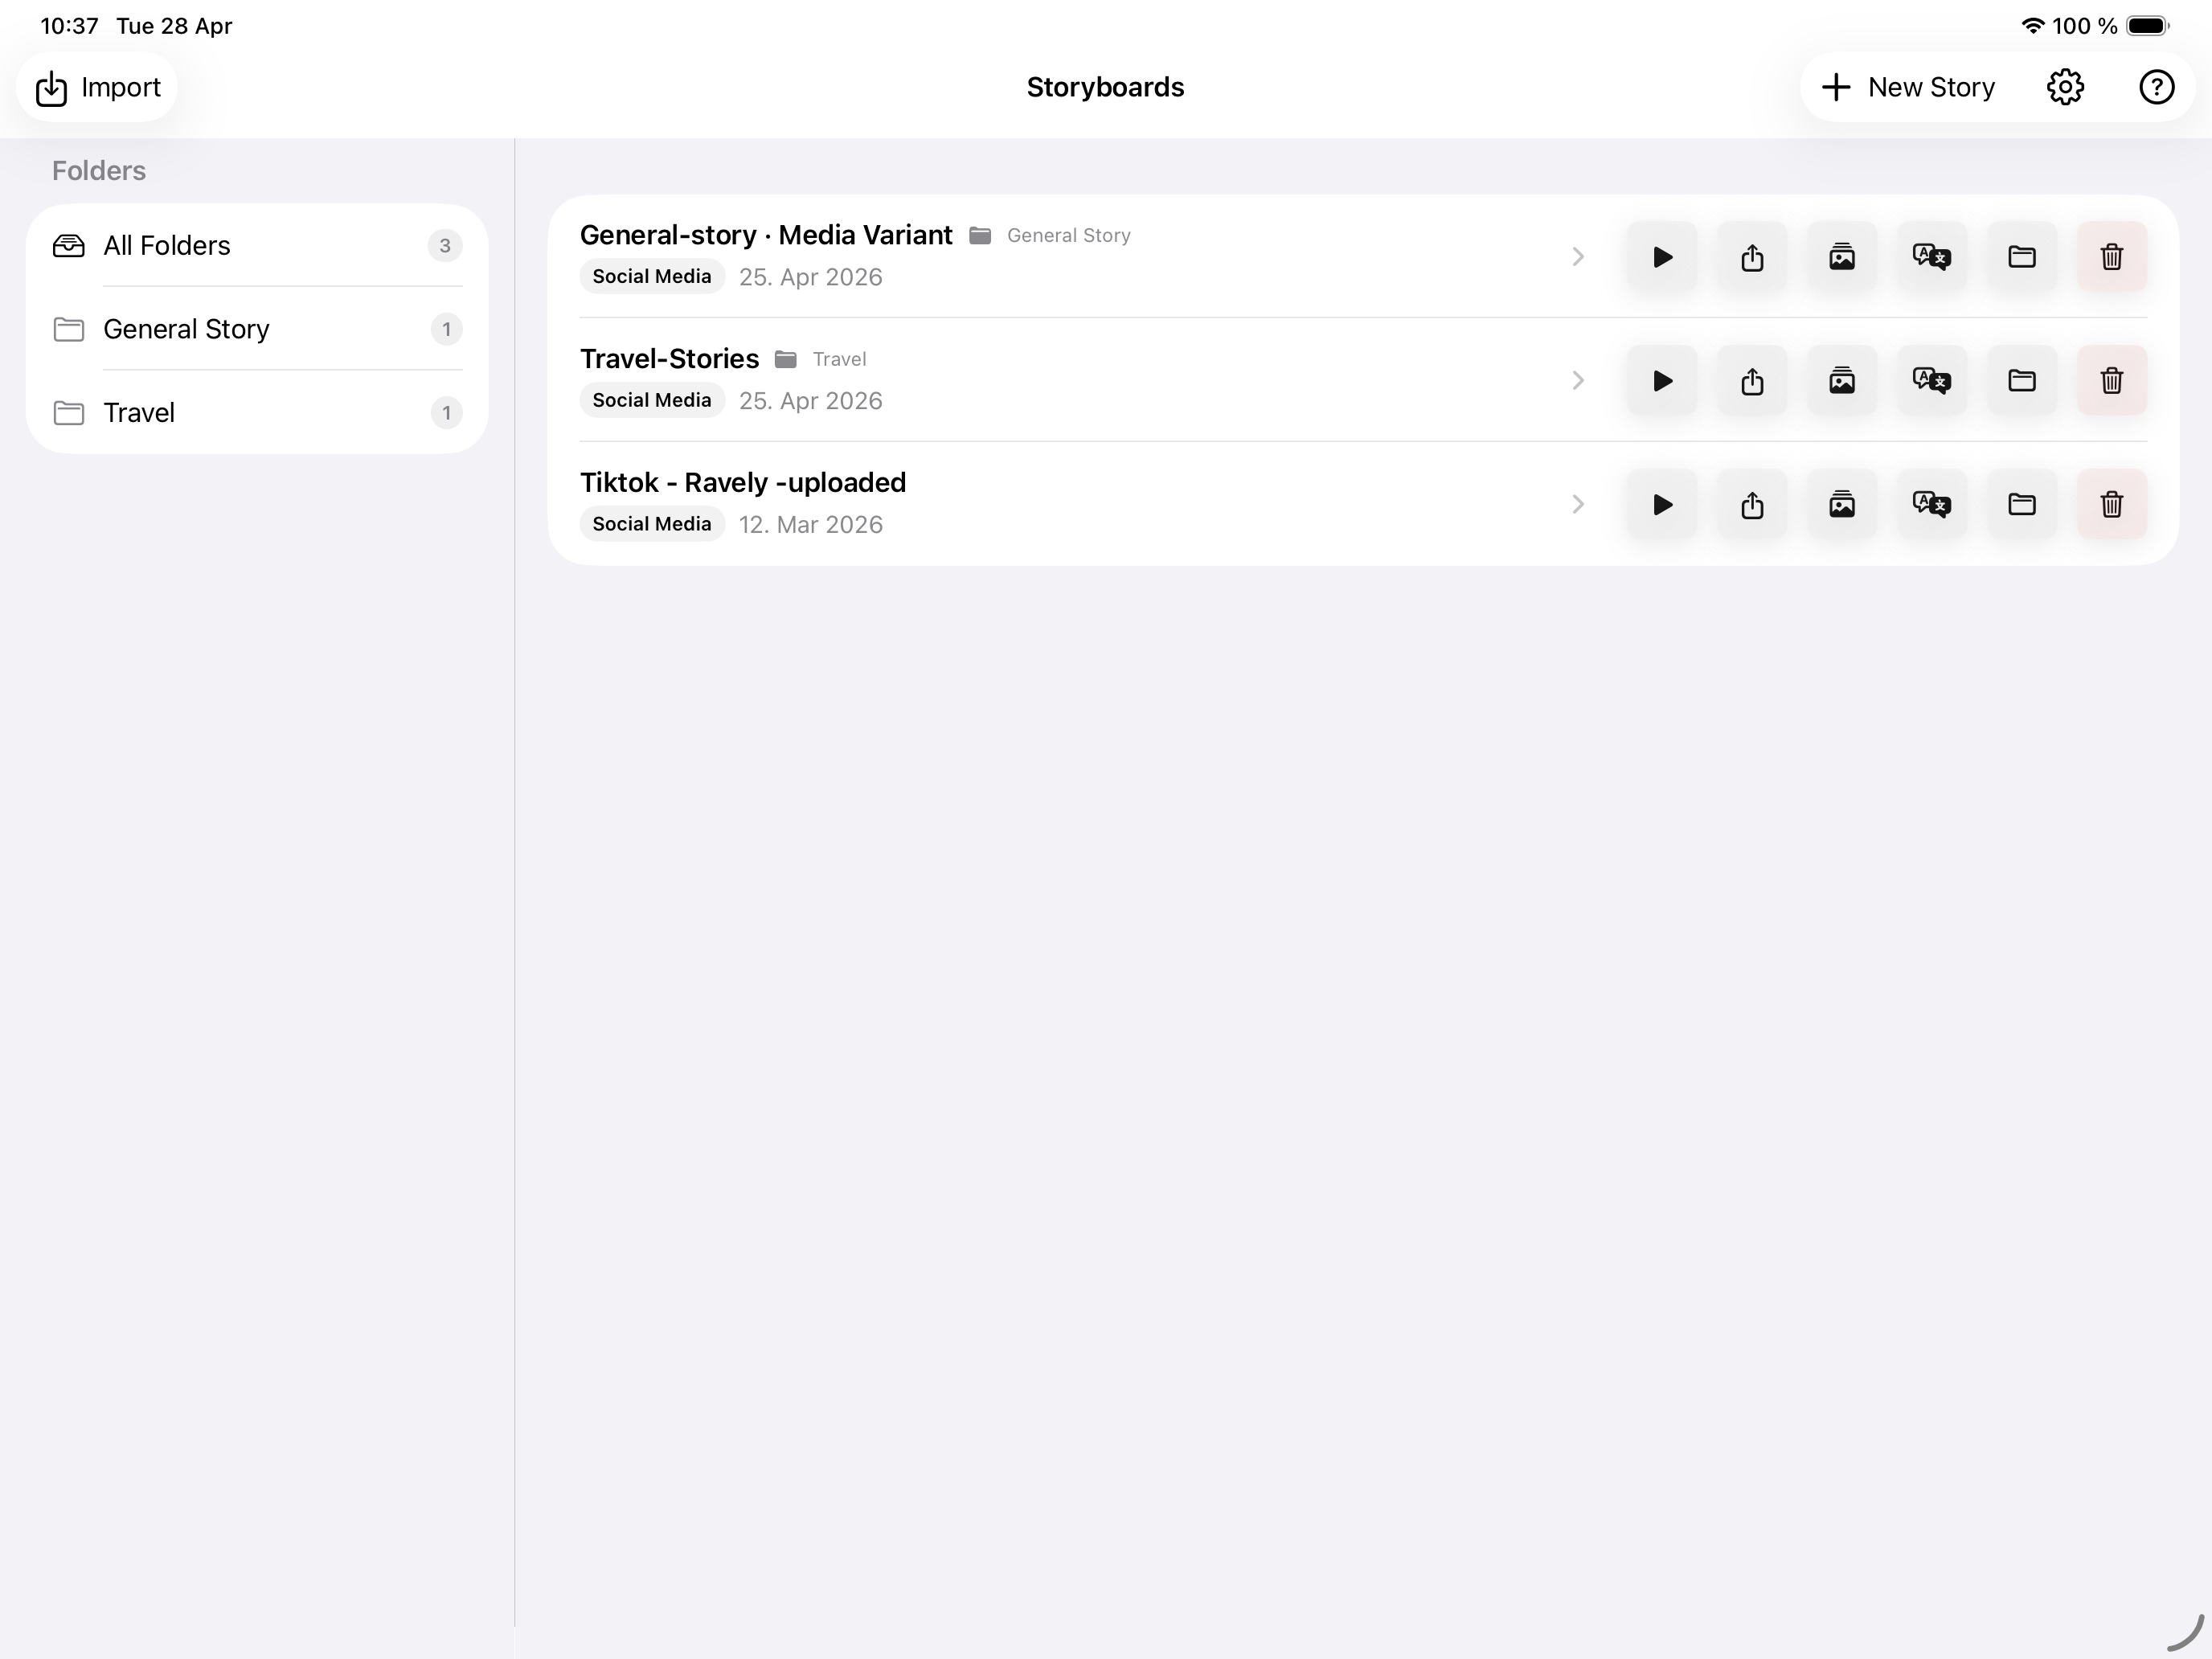
Main areas
- Story List: all stories, folders, actions, import, export, and settings.
- Story Editor: story-level text, scenes, platform settings, Quick or Advanced editing, preview, and share.
- Scene Detail: per-scene media, text, narration, image prompt, timing, motion, and framing.
- Settings: general app settings, cloud sync, templates, export defaults, and a separate AI settings dialog for AI providers and prompt templates.
Common icons
- creates a new story.
- previews a story.
- shares or exports.
- creates a translated copy.
- moves a story into a folder.
- means a story is read-only.
2. Create a quick social video
Use this scenario when you want a TikTok, Instagram Reel, or YouTube Shorts video from photos, videos, or text scenes.
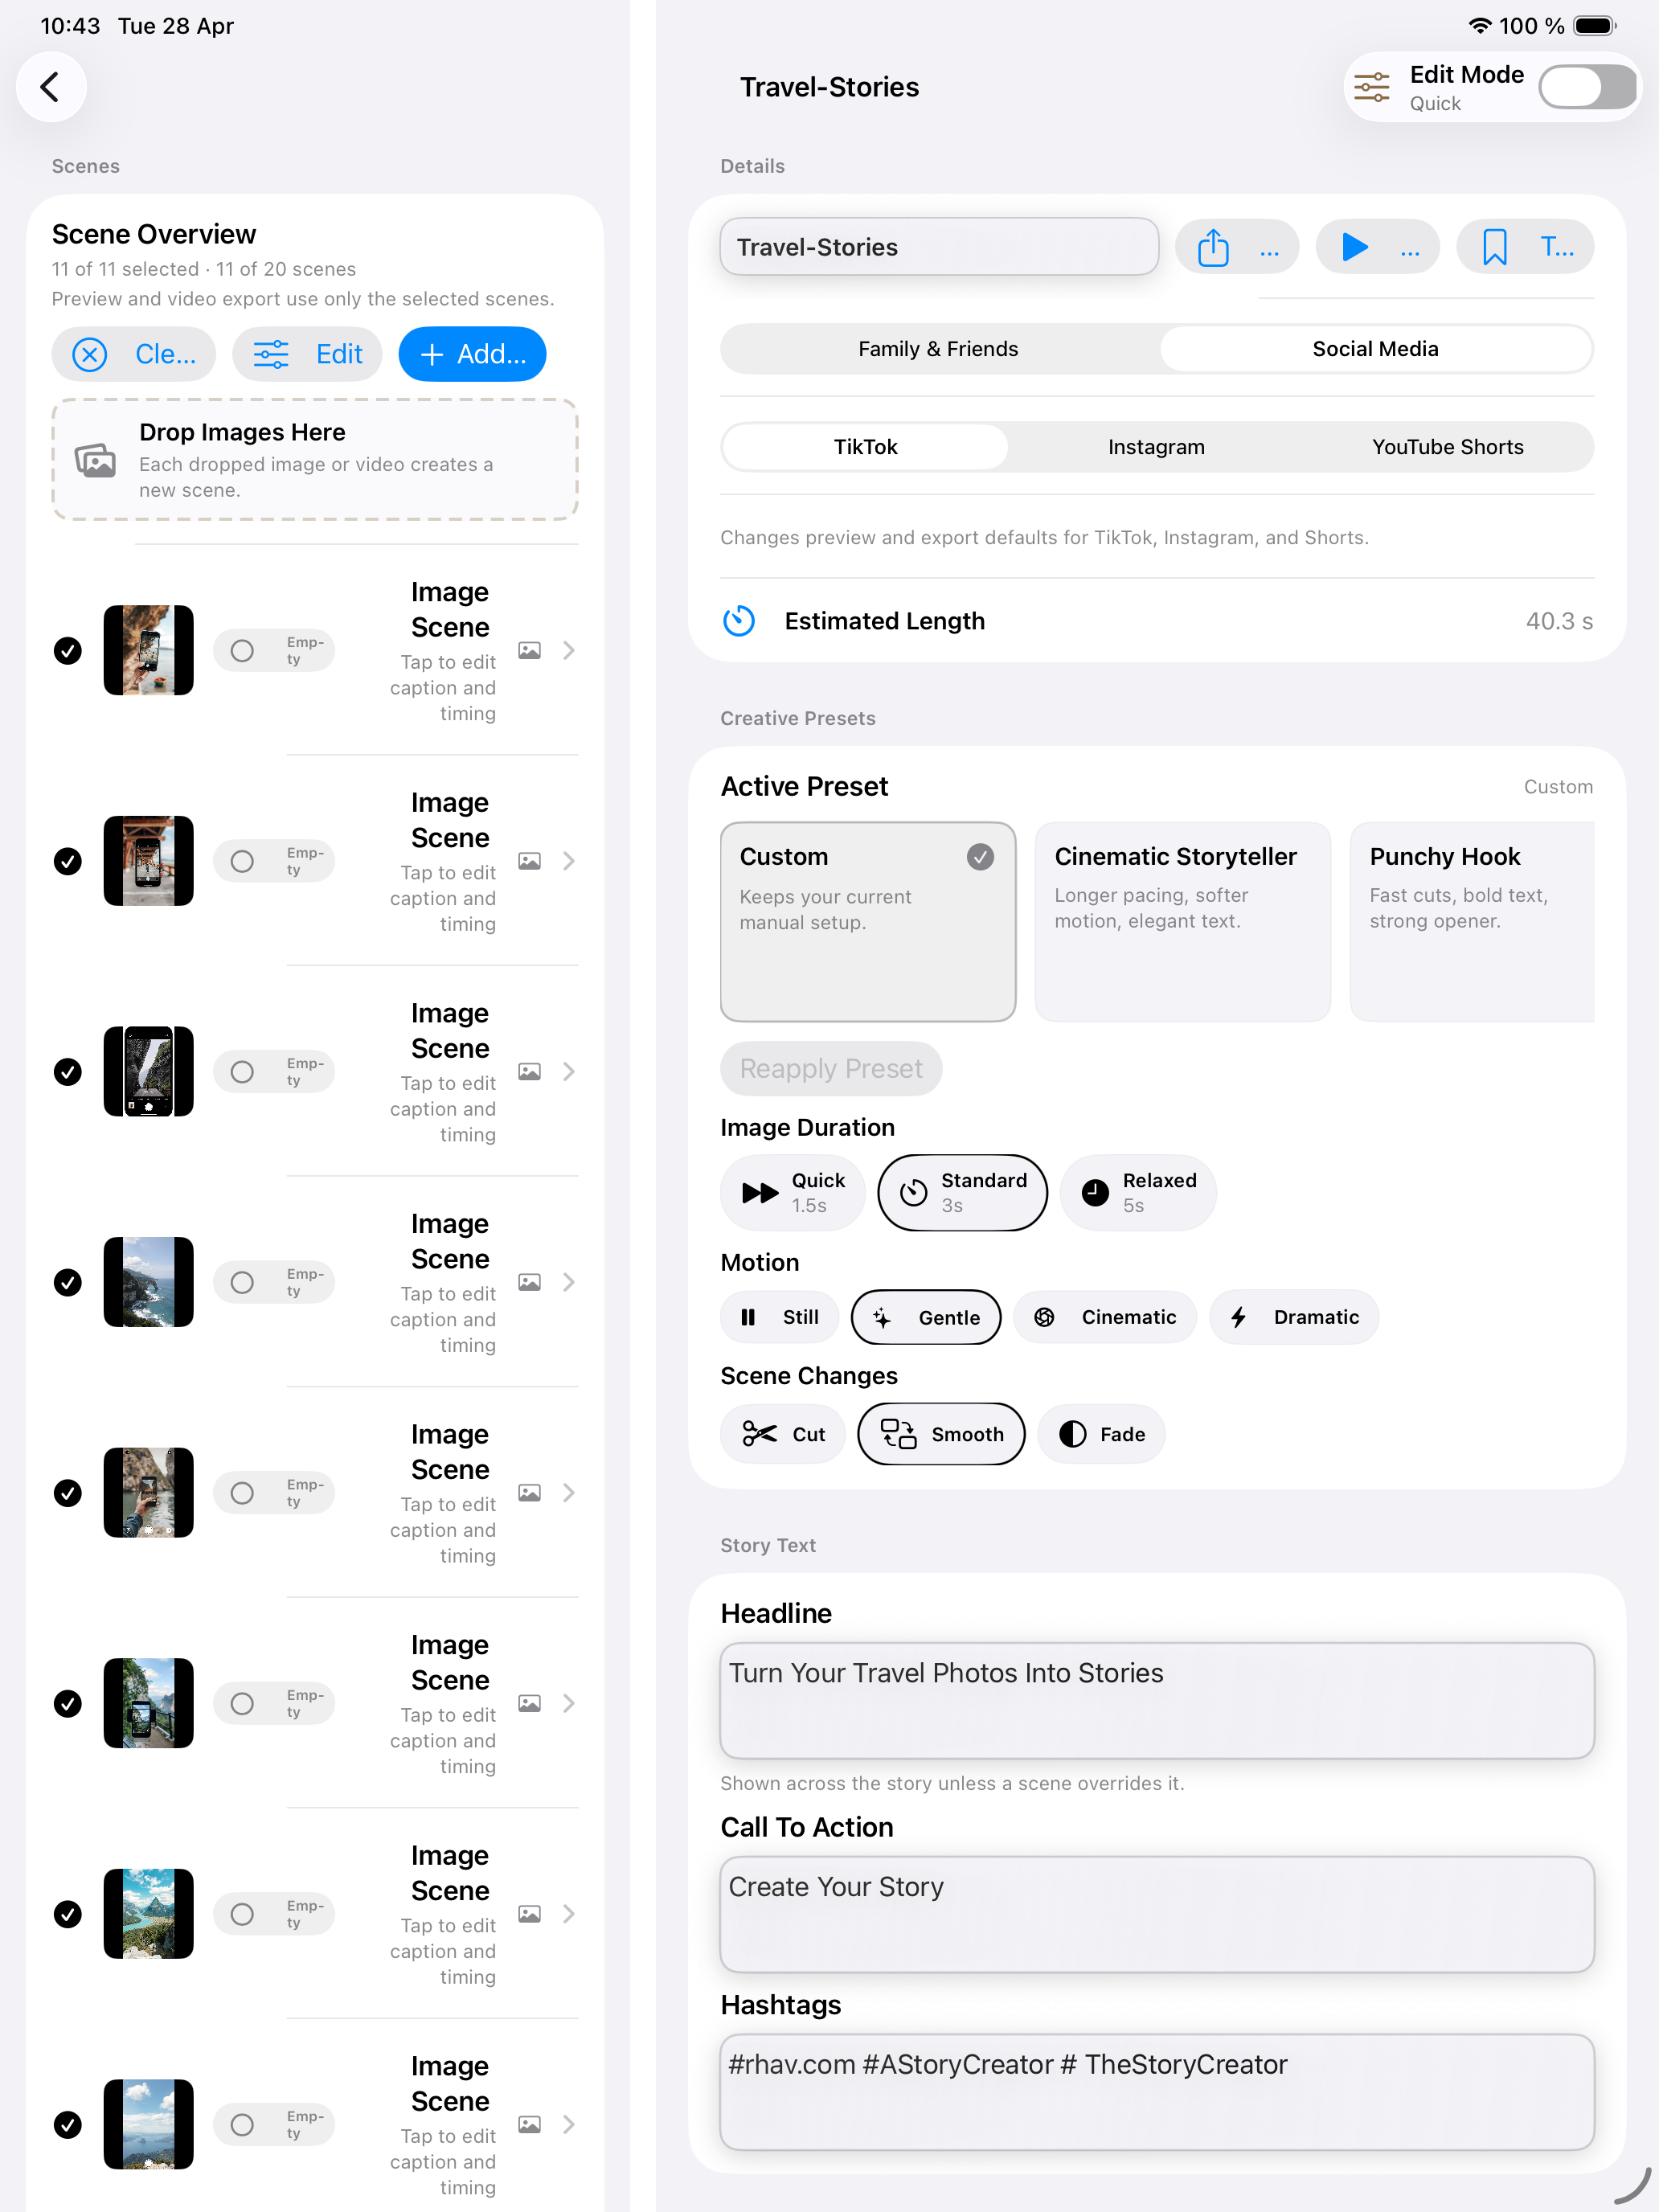
Steps
- Open the story list and tap
+. - Choose the platform.
- Create the story.
- Add photos, videos, or text scenes.
- Use Quick mode for story text, audio, preview, and share.
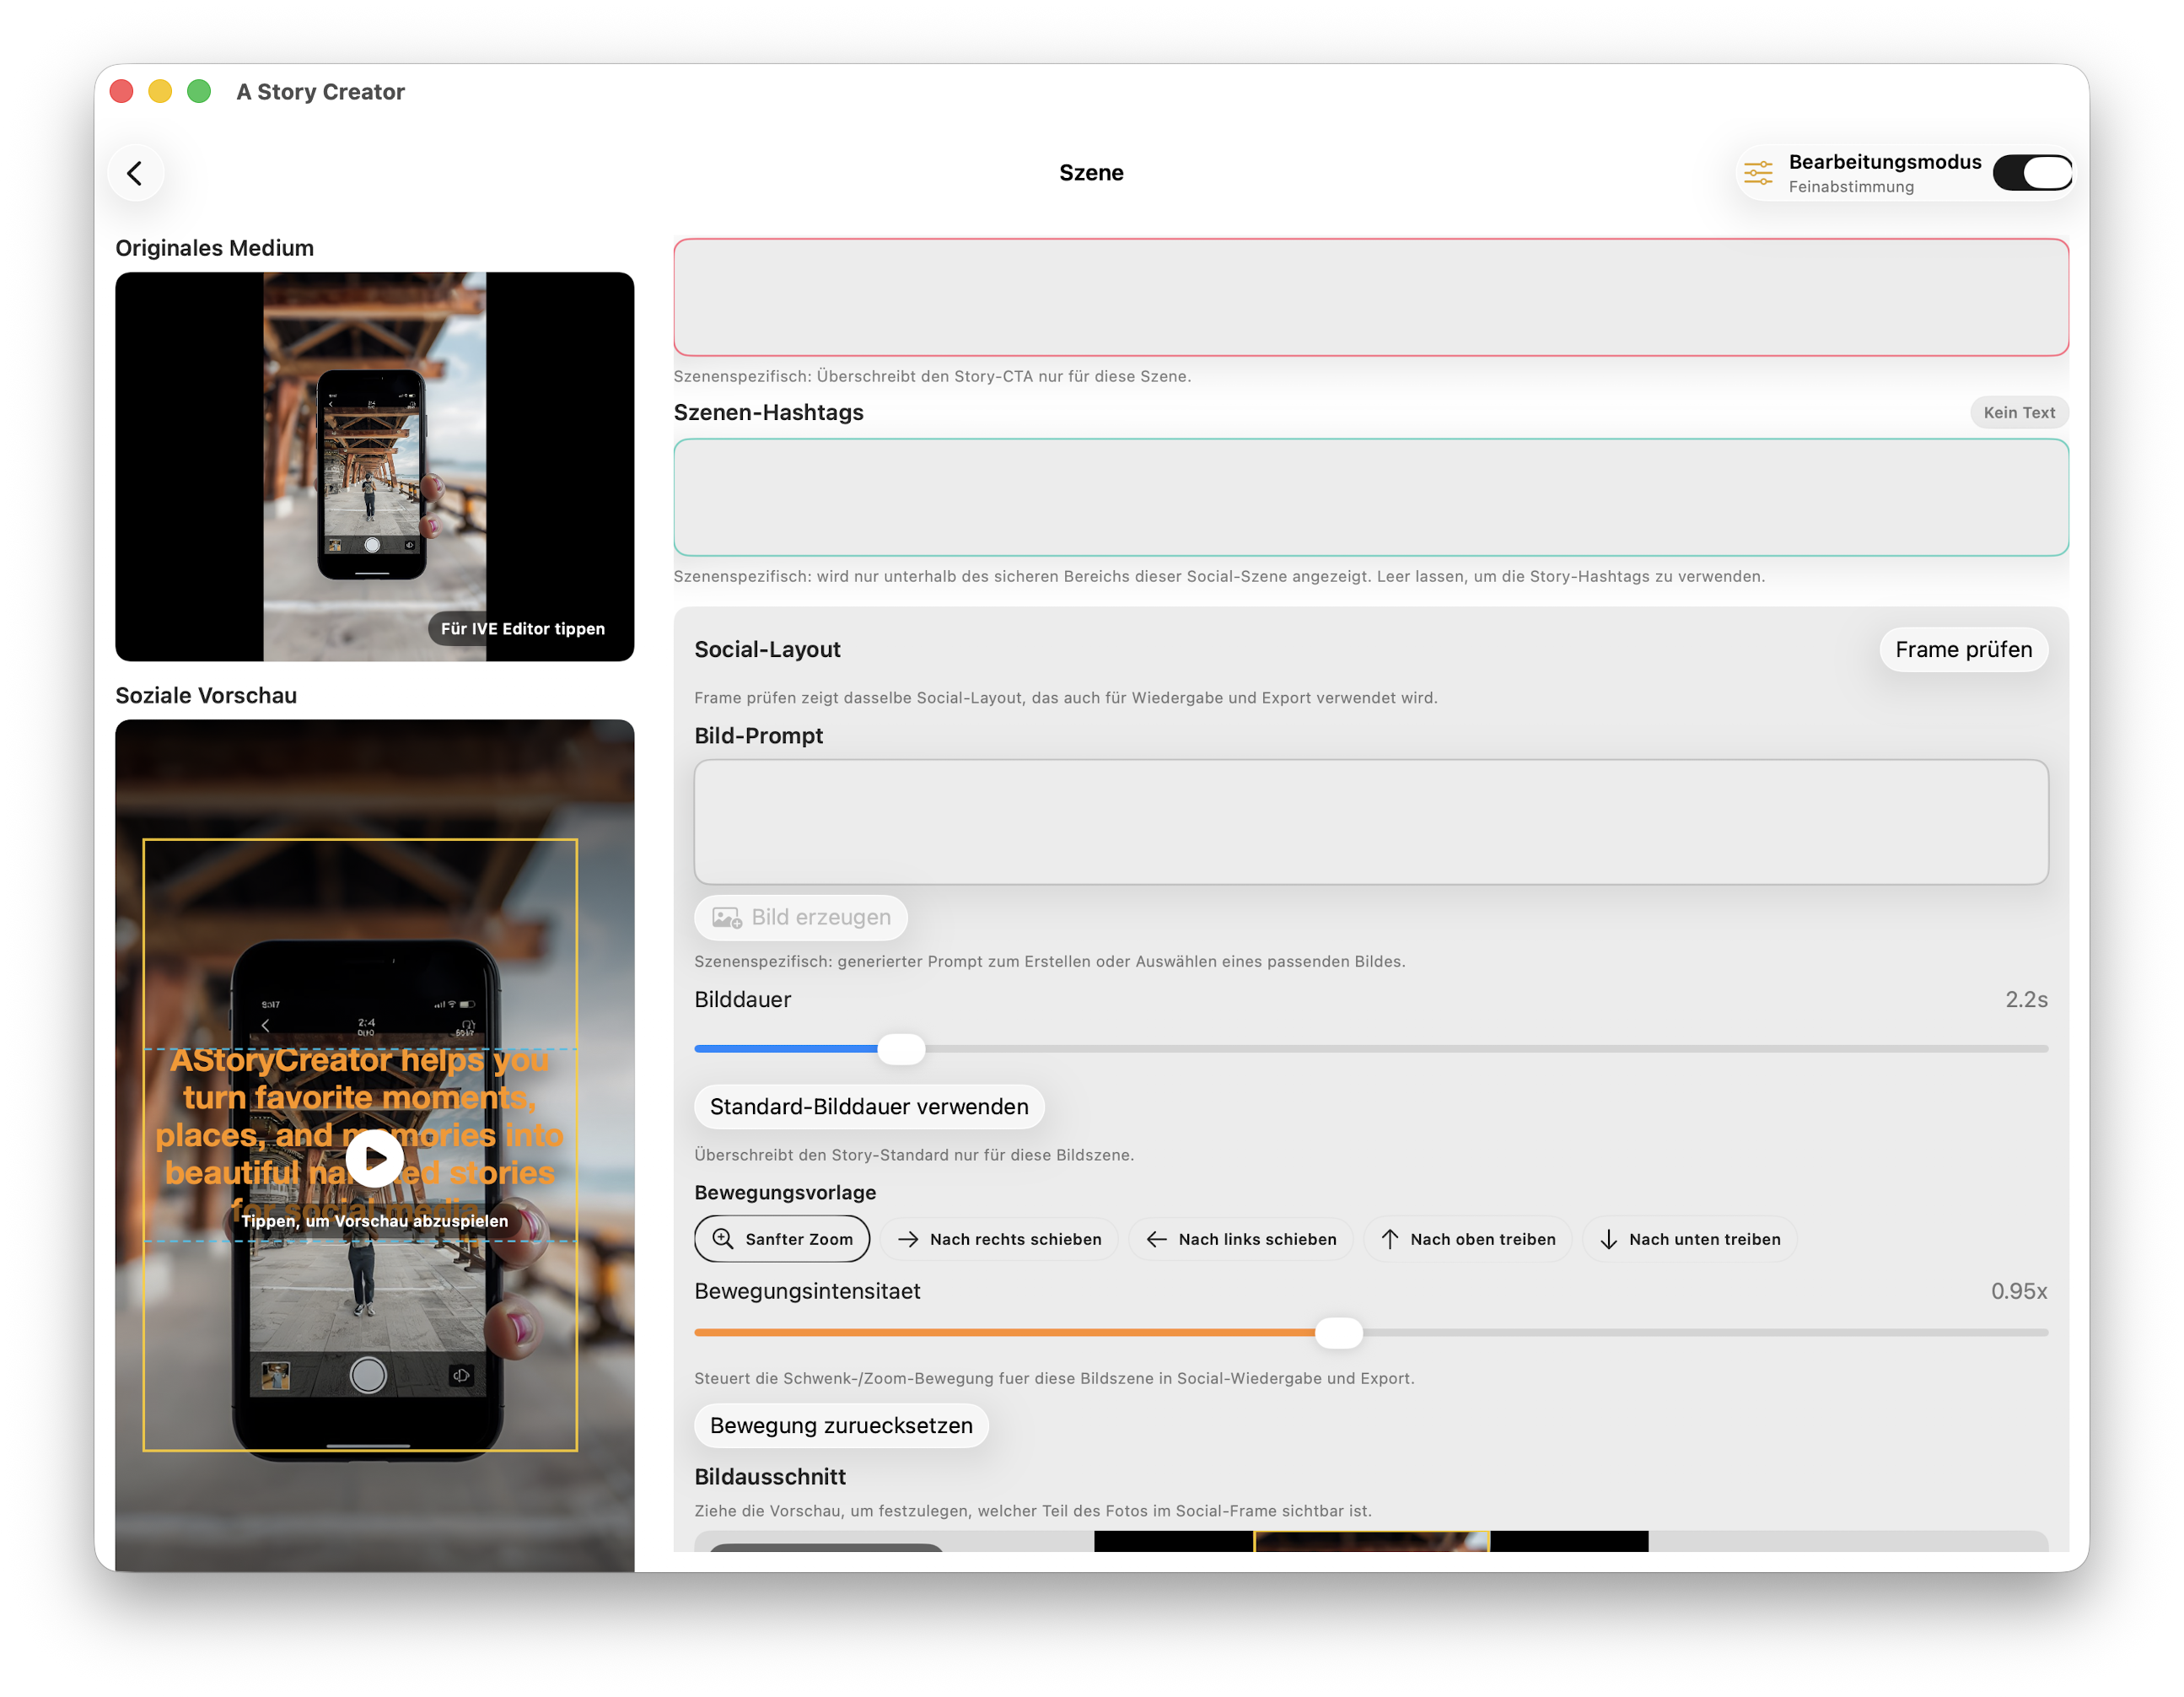
- Open a scene if you need to replace media, edit top text, edit middle caption, or adjust timing.
- Use Preview Story before exporting.
- Use Share Video to create the final social video.
When to use Advanced
Open Advanced only when you need exact timing, transitions, safe-area tools, detailed layout controls, image framing, prompt fields, export variants, or batch workflows. Quick mode keeps the everyday edit, preview, and share controls close together.
3. Generate a complete story with AI
AI story generation is free to use. You provide your own model endpoint or API key.
Setup
- Open Settings.
- Enable AI Features.
- Open AI Story Generation.
- Choose OpenAI, Grok, Custom LLM, or Apple Foundation Models when available.
- For OpenAI or Grok, enter the matching API key and model.
- For Custom LLM, enter a full OpenAI-compatible chat completions URL, optional API key, and model.
- Apple Foundation Models run on supported Apple Intelligence devices and do not need an API key or network connection.
Generate
- Tap
+in the story list. - Choose Generate with AI.
- Enter the story idea.
- Choose the platform.
- Enter tone or style.
- Choose the target language.
- Choose the scene count.
- Optionally choose a social preset or saved social template to guide the generated layout.
- Add an optional call to action.
- Generate the story.
Result
The app creates a complete storyboard and opens the editor. Generated narration is placed in the text-to-speech text. Generated image prompts and video prompts are stored with the scenes so you can edit and reuse them later.
Family & Friends stories start without social presets or saved social templates. Social Media stories can use presets and templates because those stories depend more on platform, captions, hooks, and export shape.
4. Generate images from image prompts
AI image generation is configured separately from story generation because image providers use different models, endpoints, and prices.
Setup
- Open Settings.
- Enable AI Features.
- Open AI Image Generation.
- Choose OpenAI, Grok, or Custom Image Endpoint.
- For OpenAI or Grok, enter the matching image API key and image model.
- For a custom endpoint, enter a full OpenAI-compatible image generations URL, optional API key, and image model.
Generate
- Open an image scene.
- Review or edit the Image Prompt.
- If the scene already has an image, choose whether it should be used as a starting point when the selected provider supports that workflow.
- Tap Generate Image.
- Wait for the image to be returned.
- Preview the scene.
Result
The generated image replaces the current scene photo. The prompt remains visible so you can adjust it and generate again. The app accepts image responses that return b64_json image data or an image URL.
5. Generate videos from video prompts
Use video generation when a still image is not enough and you want a short generated clip for one scene. Video providers are more experimental than text or image providers, so keep prompts short, preview results, and expect occasional provider-specific errors.
Setup
- Open Settings or the AI settings button next to the generation controls.
- Enable AI Features.
- Open AI Video Generation.
- Choose OpenAI Sora, Grok Imagine, or Custom Video Endpoint.
- Enter the required API key, model, duration, and size or resolution options for your provider.
Generate
- Open a scene.
- Review or edit the Video Prompt.
- If the scene already has an image, choose whether it should guide the video when the provider supports image-to-video generation.
- Tap Generate Video and keep the sheet open until the operation finishes or you cancel it.
- Preview the scene and adjust the scene length if the generated clip is shorter than the story timing.
6. Add narration or text-to-speech
Use narration when the video needs spoken guidance, voiceover, accessibility-friendly audio, or a more personal presentation.
Record narration
- Open the story or scene audio controls.
- Tap Record.
- Pause, resume, or stop as needed.
- Preview the story.
Use text-to-speech
- Open the TTS text.
- Edit the narration.
- Choose a voice for the story target language when available.
- Adjust speed, pitch, and volume if the selected provider supports them.
- Apply the generated audio.
- Preview the story to check timing and ducking.
For AI-generated stories, scene narration is loaded into the TTS text so it can be edited before audio generation. If narration audio is present, the app can use the audio duration to help match the scene length.
Apple Voice uses voices installed on the device. OpenAI Voice and Custom Speech Endpoint use cloud or local speech services, so they require the matching AI speech settings.
7. Translate a story
Use translated copies when you want to keep the original story unchanged.
Setup
- Open Settings.
- Open AI Settings and choose the translation service.
- Add the required API key or custom LLM endpoint.
Translate
- Open the story list action for a story.
- Choose Translate Copy.
- Select the source language.
- Select the target language.
- Create the translated copy.
The app creates a new story. Media and structure stay aligned with the original.
8. Use templates
Templates save setup, not media. Use them when you repeatedly create similar videos for a brand, client, product, trip, or campaign.
Create a template
- Build a story with the settings you want to reuse.
- Tune the first scene if you want a reusable style.
- Save the story as a template.
Use a template
- Tap
+. - Open More Options.
- Choose a template.
- Create the new story.
Templates can include story settings and first-scene style. Scenes and media are not copied. Family & Friends stories start fresh; saved templates are used for Social Media stories.
9. Create bulk exports
Use this scenario for many short videos with one consistent style.
Workflow
- Add all media as scenes.
- Finish the first scene carefully.
- Use Apply First Scene to copy its settings to the other scenes.
- Select the scenes you want to export.
- Use Share Each Scene as Video or Batch Export.
- Choose naming and quality options.
Preflight
Preflight messages are warnings. They help you catch missing media, unusual timing, or export risks before files are created.
10. Organize projects
Use folders for clients, brands, campaigns, travel projects, drafts, or archived stories.
Steps
- Create folders from the story list.
- Move stories with the folder action.
- Use story list filters to focus on one folder.
- Use No Folder to see stories that are not assigned to any folder.
- Rename a folder when a project changes.
- Remove a folder when you no longer need the folder itself; the stories stay in the app and move to No Folder.
- Keep variants near the original story.
Folder organization is especially useful when you create several versions of the same story.
11. Export and share safely
Use Preview Story before every important export.
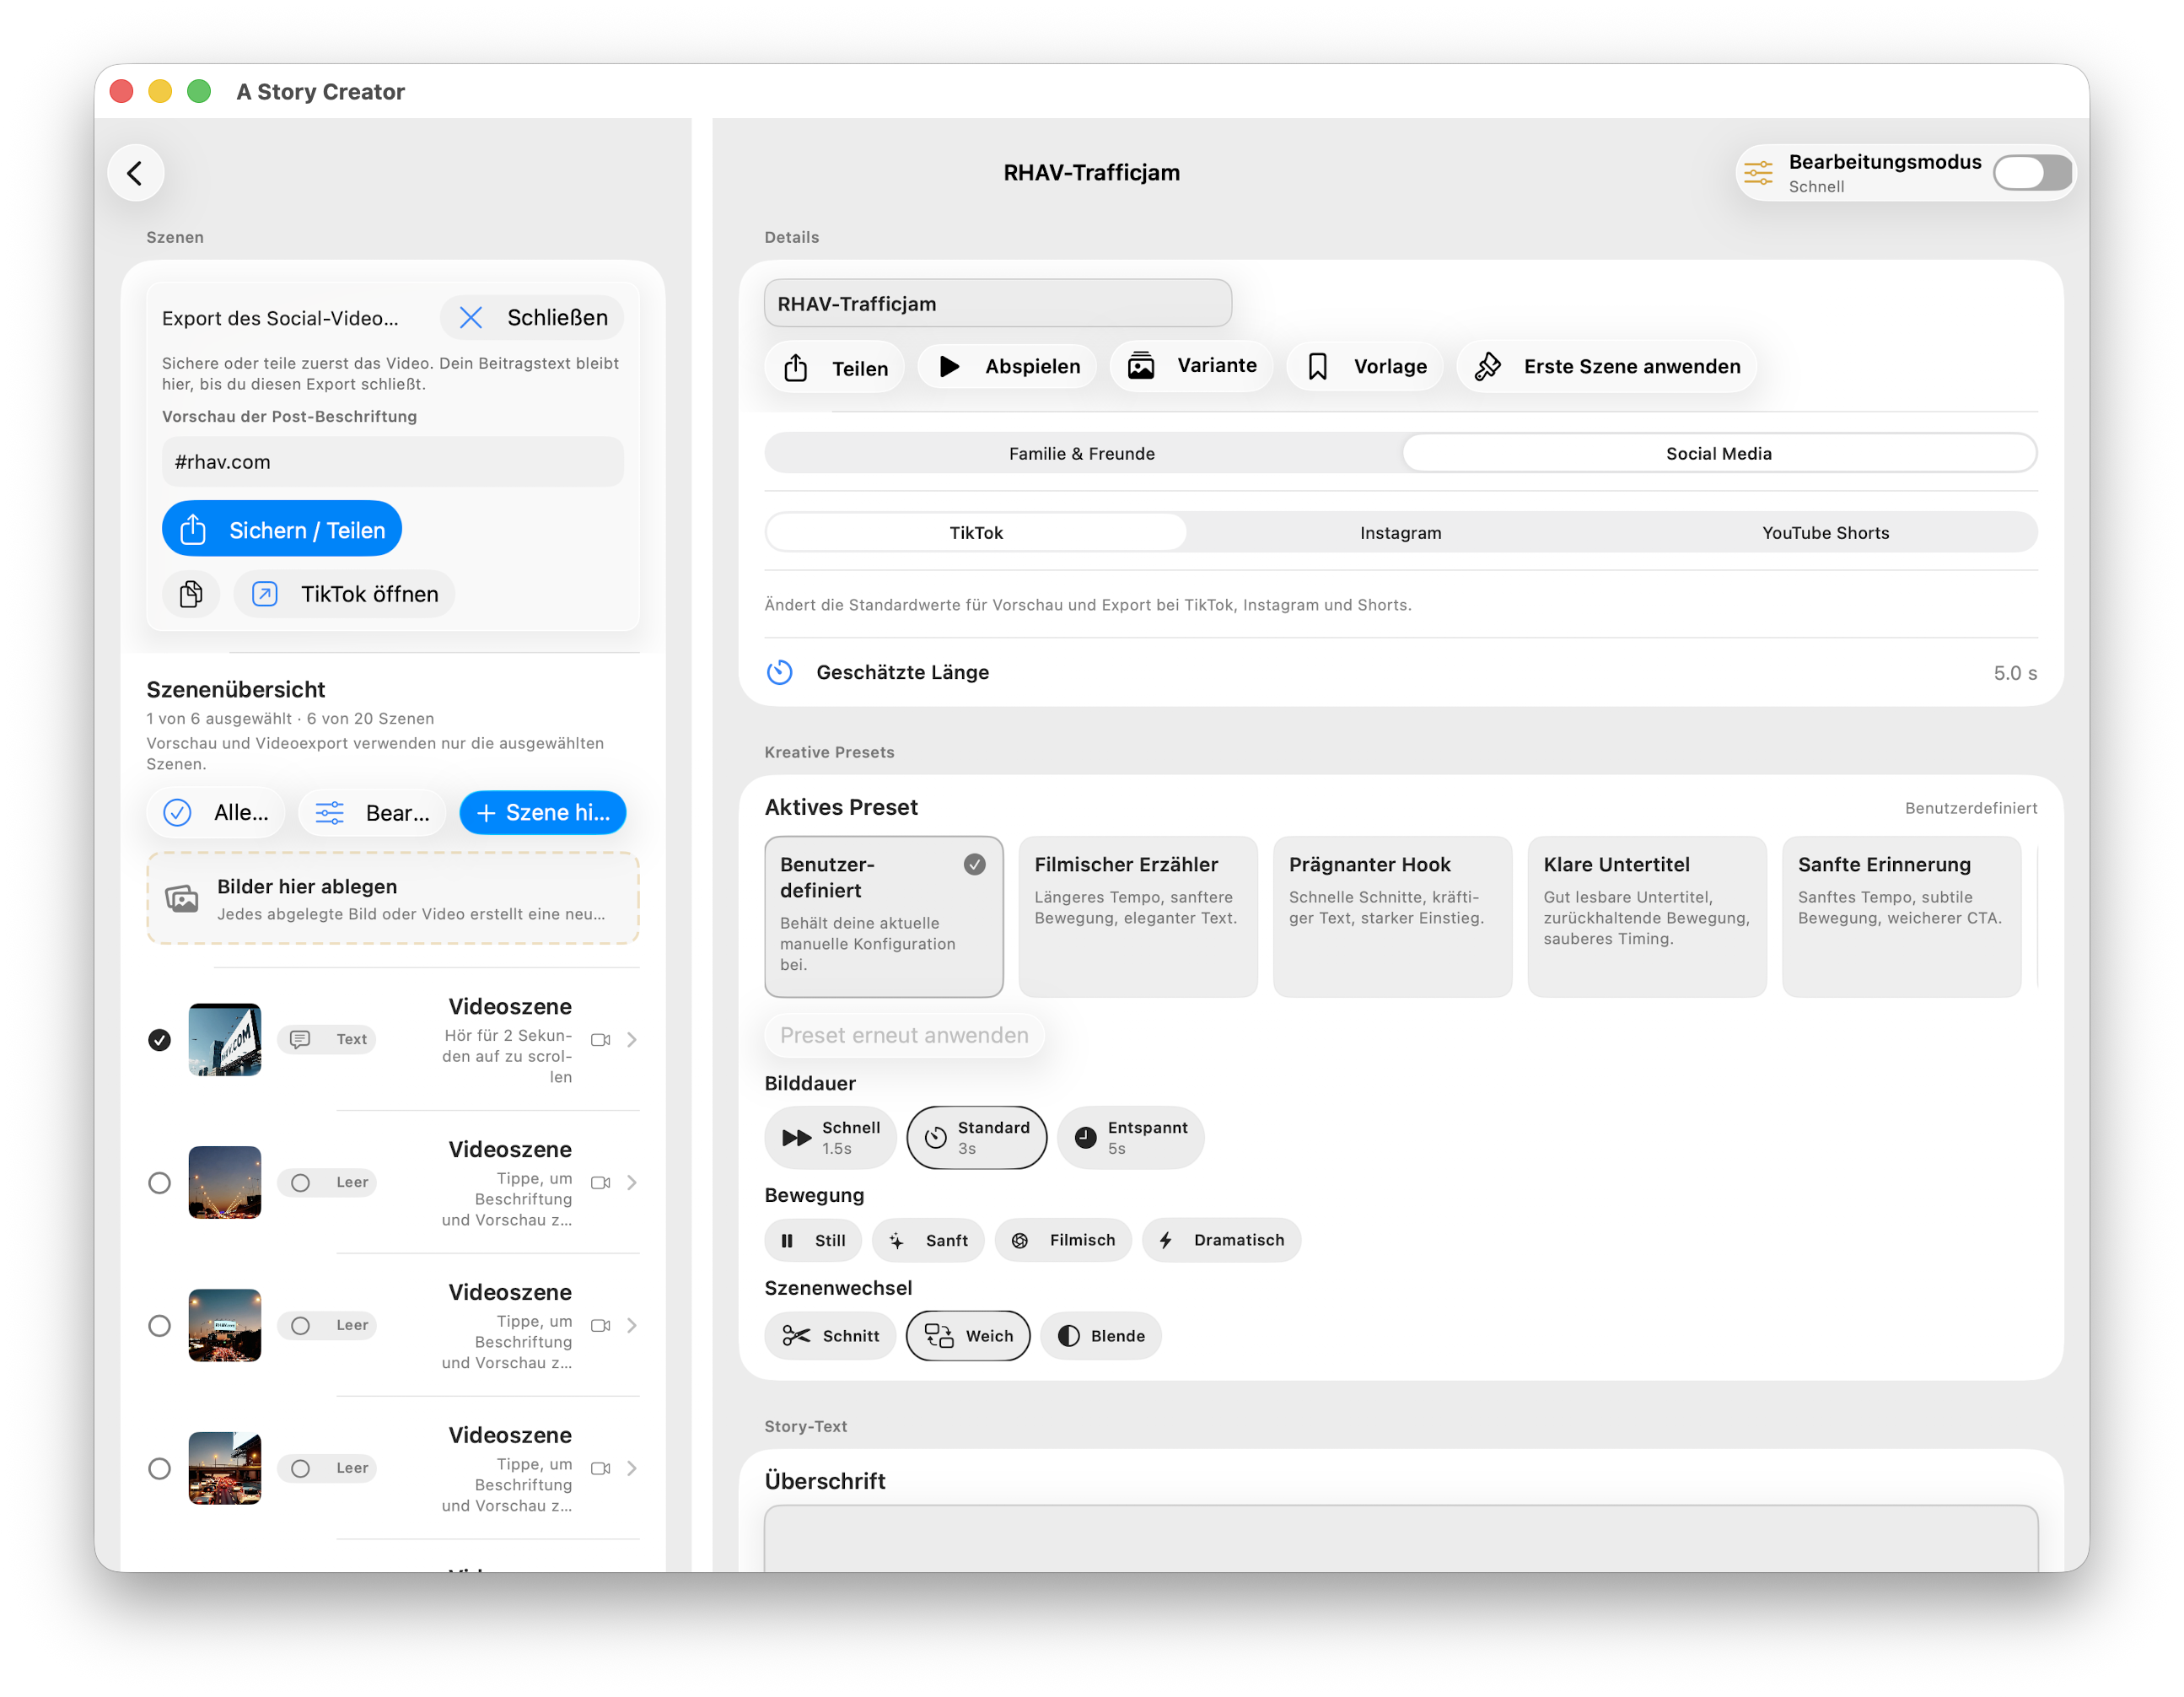
Checklist
- Preview the full story or selected scenes.
- Check text placement and safe areas.
- Check audio timing.
- Check that no media is missing.
- Use Share Video for TikTok, Instagram, or YouTube Shorts.
- After export, use the result card to copy the post caption, open the target app, share, or save the video.
- Use Export Project when you want an editable archive.
If export fails, check storage space, file access, imported media, and audio/video compatibility.
12. Manage AI settings and keys
AI settings live in their own settings dialog. You can open it from Settings or from the related story, image, video, translation, or speech controls.
API key storage
API keys are stored in Keychain. By default they stay on the current device. If you enable iCloud Keychain sync for API keys, the keys can appear on your other devices signed in with the same Apple Account.
Provider-specific keys
OpenAI, Grok, custom LLM, custom image, custom video, and custom speech keys are handled separately. Use the key field that belongs to the provider you selected.
Prompt templates
Professional users can edit prompt templates for story generation, translation, image generation, video generation, and speech generation. Keep required placeholders such as {{imagePrompt}} or {{videoPrompt}} when the template shows them. A broken template can cause invalid model output.
13. Troubleshooting
AI story generation does not start
Check that AI Features are enabled and the configured story generation service has the required key or endpoint.
Image generation asks for settings
Open Settings and check AI Image Generation. OpenAI requires an API key. A custom endpoint requires a valid image generation URL.
A custom model fails
Check that the endpoint is OpenAI-compatible, reachable from the device, and returns either b64_json image data or an image URL for image generation.
Video generation fails
Check the provider endpoint, model, duration, size or resolution, and API key. Some providers require a submit request followed by a status request, and errors can differ from normal image generation.
Speech generation fails
Check the selected speech provider, voice, API key, and target language. On Mac, some installed premium voices may be listed by the system but unavailable to the app runtime.
Text or narration looks wrong after AI generation
Open the scene and edit top text, middle caption, and TTS text manually. AI output is a draft, not a locked result.
Export fails
Check missing media, storage space, source video compatibility, and audio files. Try a smaller export preset if the device is low on memory.